This is the first of a 4 articles series on how to get you started with Deep Learning in Python.
- Part 1: Setting up your Mac
- Part 2: Getting started with AWS
- Part 3: Setting up a GPU AWS instance
- Part 4: Optional additional software
In this guide I'll show you how to:
- download and install Anaconda Python on your laptop
- create a conda environment for your deep learning development
- install the required packages in that environment
Download and install Anaconda Python
Anaconda is the leading open data science platform powered by Python. The open source version of Anaconda is a high performance distribution of Python and R and includes over 100 of the most popular Python, R and Scala packages for data science.
It can be downloaded here. Python comes in two major versions: 2.7 and 3.x. Python 2.7 is considered legacy, while 3.x is the present and future of Python. Despite this, I often recommend to install Python 2.7, because of the larger library support. If you are a complete beginner, you may want to start directly with Python 3.x. A detailed explanation of the differences between 2.7 and 3.x can be found here, and here you can find a discussion about what version to choose.
In Dataweekends workshops we use Python 2.7, because that's what most of our users are already familiar with.
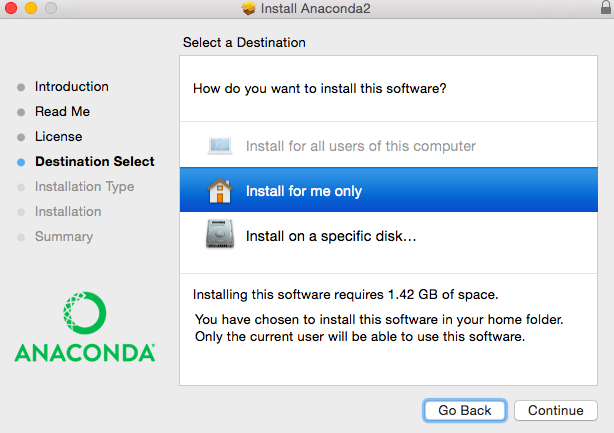
Once you've downloaded Anaconda, you should install it on your Mac following the instructions provided by the Graphical installer.
Here are a couple of screenshots of key steps:

Unless you have very specific reasons to do so, we recommend to install anaconda for the local user only.

Create a conda environment for deep learning
The guys at Continuum have developed an extremely versatile package manager called conda. It is a package manager that quickly installs, runs, and updates packages and their dependencies. It can also query and search the package index and current installation, create new environments, and install and update packages into existing conda environments.
Conda environments are coherent collections of packages with specific versions that can be used to ensure portability of your python code. For example, imagine you developed a short python program that uses version 1.2 of a certain package. Let's say you want to share your code with a friend, but are not sure if she has the same package on her laptop. You ask your friend, and she is currently using version 1.0 of that package, because she uses it as part of another project. So, your friend doesn't want to update the library to 1.2 and would also like to test your script, which requires the upgrade. An environment solves this problem by allowing your friend to have both versions of the library, 1.0 and 1.2, in two separate environments, so that they do not interfere with one another.
Let's create an environment for our data science development, we'll call this environment dataweekends, but you can call it with any name you want.
In a terminal window type:
conda create -n dataweekends python=2.7 pandas scikit-learn jupyter matplotlibhit Enter and answer y when prompted to proceed. If all goes to plan at the end you should see this message:
# To activate this environment, use:
# > source activate dataweekends
#
# To deactivate this environment, use:
# > source deactivate dataweekends
You can then go ahead and activate the environment typing:
source activate dataweekendsThis will prepend (dataweekends) to your terminal prompt. You can verify that you are in the correct active environment by typing:
which pythonwhich should return:
/Users/<yourusername>/anaconda/envs/dataweekends/bin/pythonGreat! We have created an environment and successfully activated it. Now let's install keras.
Install Tensorflow and Keras
Tensorflow is an Open Source Software Library for Machine Intelligence originally developed by researchers and engineers working on the Google Brain Team. Version 1.0 has been announced in February, so that's the version we will install. There are several ways to install it, we'll use the pip method for this tutorial. In your active dataweekends environment terminal type:
pip install tensorflowKeras is a high-level neural networks api specification, implemented in Python and capable of running on top of either TensorFlow or Theano. It was developed with a focus on enabling fast experimentation and it allows to go from idea to result with the least possible delay.
Although Keras is also provided by community channel of Anaconda packages (conda-forge), it's most recent version is best installed with pip, so we'll go ahead and use that version. In your active dataweekends environment terminal type:
pip install kerasAt the time of writing this installs keras version 1.2.2. Also, at the Tensorflow Dev Summit it was announced that keras will become part of Tensorflow from version 1.1, so in the future it will be already installed whith Tensorflow.
Voilà! You are done installing Anaconda, Tensorflow and Keras.
To test your installation you can type:
ipythonwhich will start the ipython console:
Python 2.7.13 |Continuum Analytics, Inc.| (default, Dec 20 2016, 23:05:08) Type "copyright", "credits" or "license" for more information.IPython 5.3.0 -- An enhanced Interactive Python.? -> Introduction and overview of IPython's features.%quickref -> Quick reference.help -> Python's own help system.object? -> Details about 'object', use 'object??' for extra details. details.In [1]:You can then type:
import keras, tensorflowto which it should reply: Using TensorFlow backend.
Congratulations!!! You have successfully set up your Mac for development with Python, Keras and Tensorflow!
To stop the ipython console just type CTRL+D twice.
To exit the dataweekends environment, type:
source deactivateTroubleshooting
Check the version of installed package
If you are not sure about the version of a Tensorflow (or any other package), it's easy to check that. In the ipython console (make sure you started it from within your environment)
import tensorflow
tensorflow.__version__
If you are not at the current version, you can always upgrade it using pip as explained earlier.
Switching Keras backend
Keras' backend is set in a hidden file stored in your home path. You can find it at $/.keras/keras.json. You can open it with a text editor and you should see something like this:
{
"image_dim_ordering": "tf",
"epsilon": 1e-07,
"floatx": "float32",
"backend": "tensorflow"
}
Switching backend is as easy as replacing tensorflow with theano in the last key. Then save the file and close it. If you then open ipython and import keras you should see:
Using Theano backend.You are now ready to step to the second part of this tutorial.